Server maintenance is scheduled for Saturday, December 21st between 6am-10am CST.
During that time, parts of our website will be affected until maintenance is completed. Thank you for your patience.
Use GIVING24 at checkout to save 20% on eCourses and books (some exclusions apply)!
It is often said that inspection processes save money but that inspection reports cost money. The automation of inspection processes is an important cost saving that also leads to more time being allocated to the important task of inspection. There have been recent developments in both software and gauge design, which together make paperless quality assurance a reality for all protective and industrial coating applications.
We are unable to complete this action. Please try again at a later time.
If this error continues to occur, please contact AMPP Customer Support for assistance.
Error Message:
Please login to use Standards Credits*
* AMPP Members receive Standards Credits in order to redeem eligible Standards and Reports in the Store
You are not a Member.
AMPP Members enjoy many benefits, including Standards Credits which can be used to redeem eligible Standards and Reports in the Store.
You can visit the Membership Page to learn about the benefits of membership.
You have previously purchased this item.
Go to Downloadable Products in your AMPP Store profile to find this item.
You do not have sufficient Standards Credits to claim this item.
Click on 'ADD TO CART' to purchase this item.
Your Standards Credit(s)
1
Remaining Credits
0
Please review your transaction.
Click on 'REDEEM' to use your Standards Credits to claim this item.
You have successfully redeemed:
Go to Downloadable Products in your AMPP Store Profile to find and download this item.
Recently new instruments have been introduced into the market for measuring the profile/roughness of blasted surfaces. One of the major developments is the ability to use scanning technology to rapidly assess a surface and provide profile measurement. This paper looks at the new instruments and the potential impact they can have on the measurement of profile and the benefits to the inspector in terms of the improved efficiency available in completing an inspection.
Esta norma conjunta da SSPC/NACE define o processo de preparação de uma superfície de aço-carbono ao grau de metal branco de limpeza superficial usando um método de jateamento abrasivo úmido (WAB) de limpeza. Esta norma destina-se ao uso por especificadores, aplicadores e inspetores de revestimentos ou outros cuja responsabilidade seja definir um grau padrão de limpeza superficial para superfícies de aço-carbono a ser alcançada por limpeza por jateamento abrasivo úmido.
A limpeza WAB é um processo que usa uma mistura de água e abrasivo que pode produzir diversos níveis de limpeza e perfil (aspereza) superficial similar aqueles obtidos por limpeza por jateamento abrasivo seco (DAB). A limpeza WAB pode ser especificada quando se deseja supressão de pó, e também pode ser um meio de reduzir a contaminação por sais solúveis. O nível de limpeza WAB especificado deve ser o mesmo que o grau de limpeza especificado correspondente para o processo de limpeza DAB.
This presentation will outline the results and conclusions of a number of years of testing and experience in surface preparation for high-performance coatings. Testing has shown that there are a number of important surface preparation variables that are not routinely monitored and controlled on coating projects. These variables will be identified and guidance will be provided on appropriate treatment to achieve coating results.
The SSPC Surface Profile Committee has been preparing a specification for the measurement of surface profile based on the four methods described in ASTM D4417, Standard Test Methods for Field Measurement Of Surface Profile of Blast Cleaned Steel. These methods are surface comparators, surface profile depth gauges, replica tape and the stylus profile gauges.
Many coating product data sheets call for surface profiles of 3-4 mils. Others call for 1.5-2 miles surface profile for a very similar coating type – why should this be? To start to understand this we need to first of all look at why we measure the surface profile on steel surfaces. It pretty much comes down to two main things.
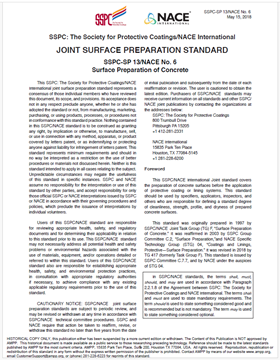
HISTORICAL DOCUMENT. This NACE International/SSPC joint standard practice covers the preparation of concrete surfaces before the application of protective coating or lining systems. The standard includes two updated tables, Table 1 details classes of surface preparation, and Table 2 provides minimum acceptance criteria for concrete surfaces before coatings are applied and relevant test methods. The updated Appendix (nonmandatory) includes two additional tables, Table A1 provides typical surface properties of finished concrete, and Table A2 provides an extensive list of surface preparation methods for concrete surfaces. This standard should be used by specifiers, applicators, inspectors, and others who are responsible for defining a standard degree of cleanliness, strength, profile, and dryness of prepared concrete surfaces.
The purpose of this standard is to describe and characterize one procedure for measuring the surface profile of metal surfaces. The measurement technique uses a compressible foam that replicates the surface profile. The thickness of the compressed foam (with the profile replicated) is then measured with a micrometric thickness gauge to determine the surface profile. Other common methods of measuring surface profile are not discussed.
Esta norma conjunta da SSPC/NACE International aborda a preparação de superfícies de concreto antes da aplicação de revestimento ou sistemas de proteção. Esta norma deve ser usada pelos especificadores, aplicadores, inspetores e outros responsáveis por definir um grau padrão de limpeza, resistência, perfil e secura de superfícies de concreto preparadas.
This paper will evaluate methods used to measure surface profiles created by power tools, namely air needle scalers, bristle cleaners, and roto peen scalers. Particular focus will be placed on the use of replica tape and its ability to characterize profiles of various surfaces using a digital replica tape reader with 3D imaging capability. More specifically, this paper will determine if the measurement methods described in ASTM D44171are appropriate for the measurement of profiles produced by power tools.
Duplex systems, also known as painting over hot dip galvanized steel, are extremely effective corrosion protection systems. However, careful surface preparation techniques need to be used to alleviate potential coating failures. The age and characteristics of the galvanized coating should be used to determine what type of surface preparation is needed. Surface preparation should develop an anchor profile for the paint without removing the zinc coating.